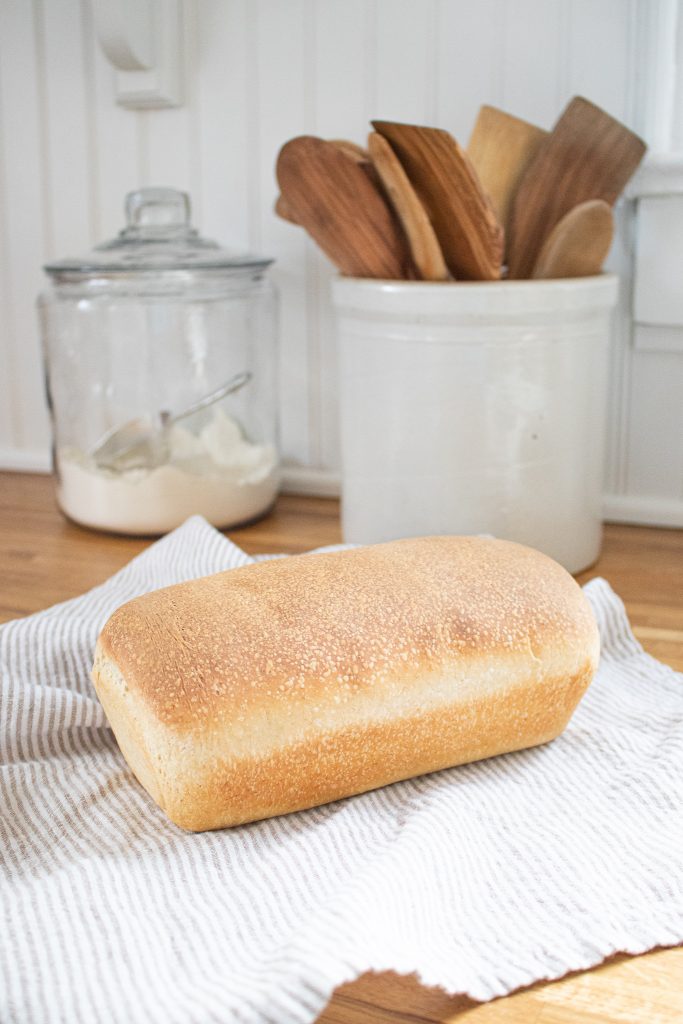
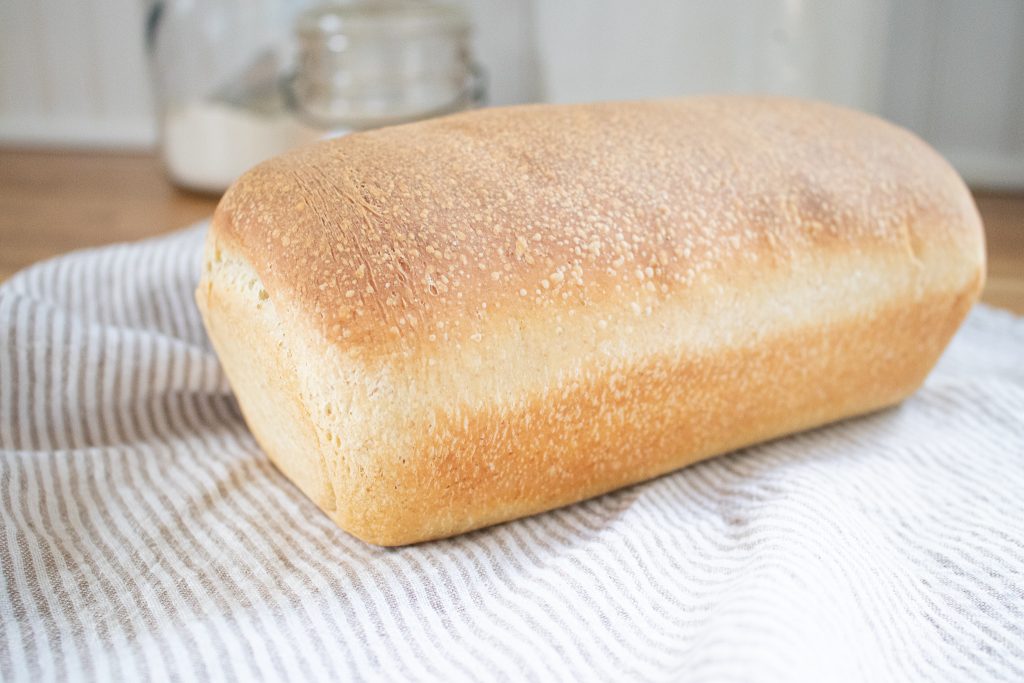
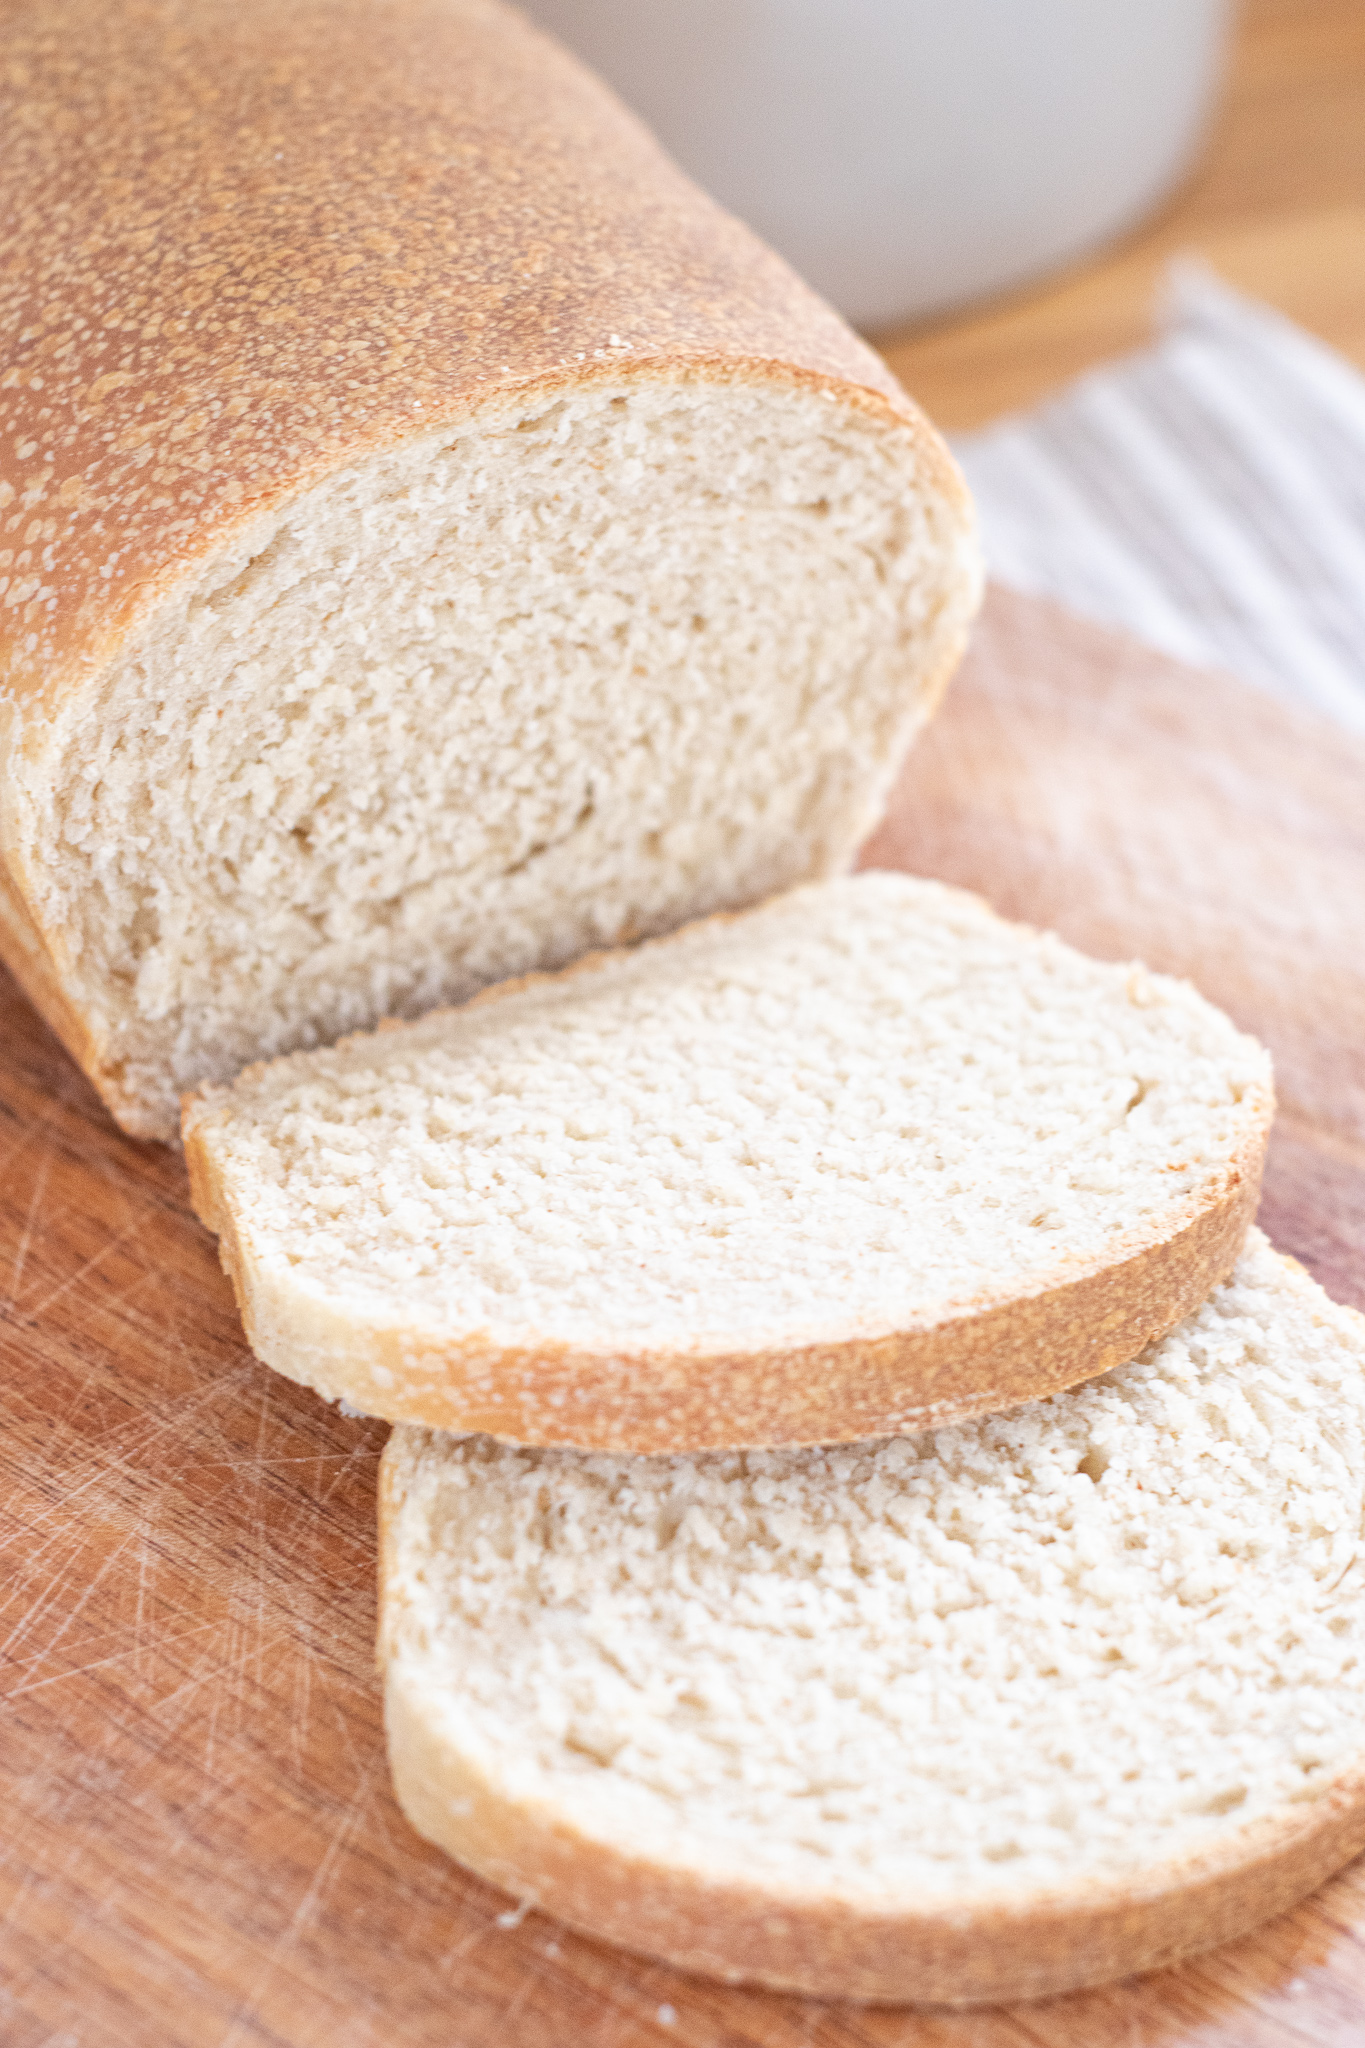
A fermented take on this tried and true bread, you’ll love this soft and spongy sourdough sandwich loaf. It slices like a dream and makes for the best sandwiches.
It has been a goal of mine this year to at some point start making all of my breads at home. When I say breads, I mean ANY type of bread that I would normally buy at the store. And not only making them but converting them to sourdough for the extra benefits of fermented grains. If I can mark one more processed item off my grocery list and replace it with a healthy homemade alternative, I’m in.
I’ve already had success with sourdough pizza crust, English muffins, pancakes, and artisan bread. Now I’m adding the humble sandwich bread to that list. Obviously, it’s one of the most commonly consumed breads in my home. Using unbleached all purpose flour to keep it close to that original sandwich bread taste, and sourdough starter to ferment the grains. This bread is a lot easier on the digestive system. I guess you could call it a healthier sandwich bread. And it really is a lot healthier than the mystery ingredient breads we buy at the store.
What is the Difference Between Sourdough Sandwich Bread and Sourdough Artisan Bread?
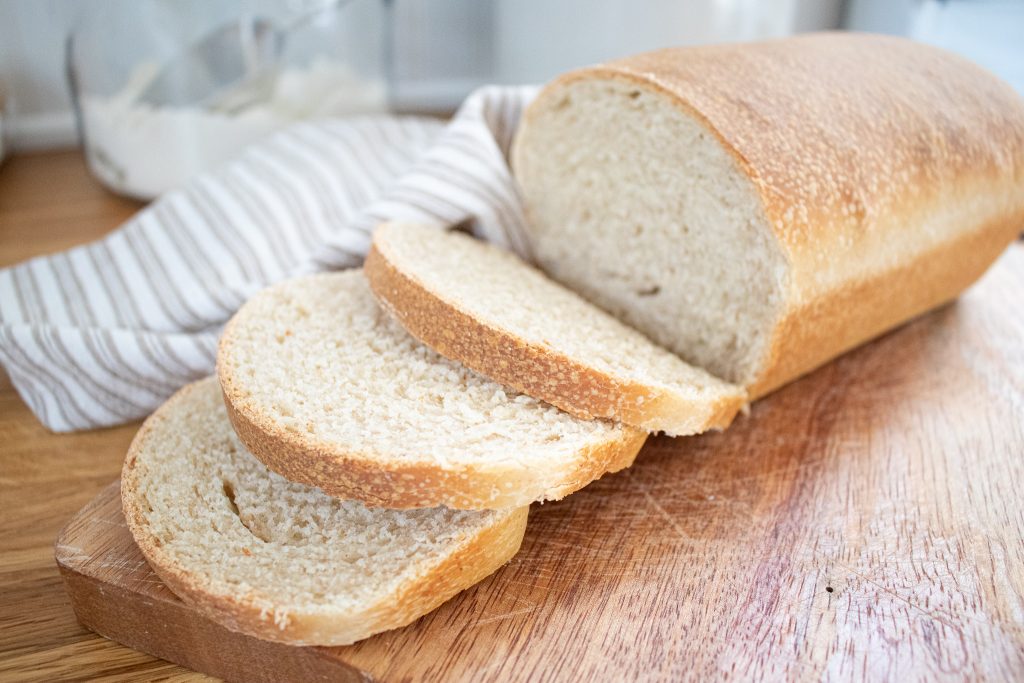
Both breads use fermentation with a sourdough starter. This process allows the bread to naturally rise without the use of instant yeast packets. However, Artisan bread contains three simple ingredients and is more of a rustic style bread whereas sandwich bread contains a fat (butter) and is a much softer bread. This is what makes it so ideal and versatile for everyday eating. It’s a lot easier to slice since it doesn’t have the same hard exterior crust that an artisan loaf will have.
If you’re interested in giving an Artisan Loaf a shot, check out this post here.
How to Make Sourdough Sandwich Bread
Here is a list of the tools you will need to make this sourdough sandwich bread
Step One – Combine Ingredients for Sourdough Sandwich Bread
Start by taking 1/2 cup of fed and active sourdough starter, 1 cup of luke warm milk, honey (or sugar), and the melted butter and mixing together until all of the ingredients dissolve.
In a large bowl, add the dry ingredients and whisk together. This is going to be your 3 1/4 cups of unbleached all purpose flour and 1 teaspoon of either sea salt or pink salt. We always separate wet and dry ingredients so that everything gets mixed together well before being combined as one.
Once your wet and dry ingredients are mixed thoroughly, add the wet ingredients into the dry ingredient until everything is combined.
Step Two – Knead the Dough
Now that your dough ingredients are combined, knead it for roughly 10 minutes. You can choose to do this by hand or with a stand mixer. I enjoy both, but either gives the same result. We’re just developing gluten here.
Step Three – Bulk Fermentation
Add the well kneaded dough to a clean and large oiled bowl. Cover with beeswax wraps or cling wrap and leave out on the counter to ferment for roughly 6-8 hours. You’ll notice that your dough is done when it has doubled in size and looks puffy.
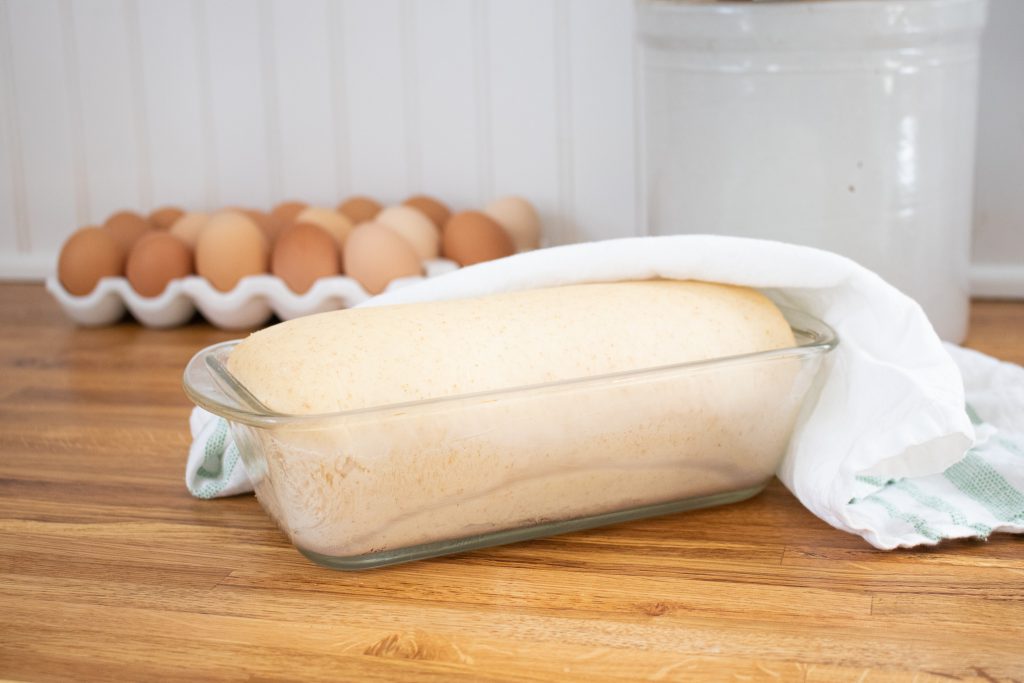
Step Four – Shape Into a Sandwich Loaf & Proof
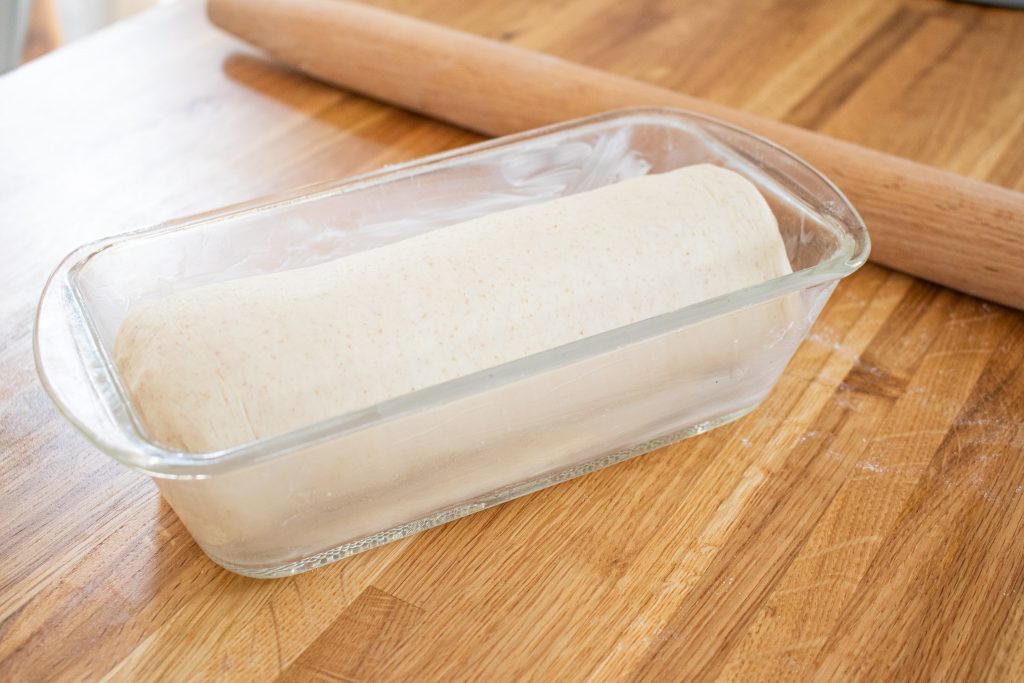
Punch the fermented dough down in the center and knead it into a ball. Then, taking a rolling pin, flatten the dough out into a rectangle that is about the same width as the bread pan you’re going to be baking in. This process is very similar to how you would roll out a cinnamon roll log.

Once your dough is nice and rolled out into a rectangle, take one end of the dough and roll it up. Like I said, this is exactly like making cinnamon rolls. Minus the butter and cinnamon filling.

Now stuff that pup in your bread pan and cover it with a tea towel to proof. Proofing should take anywhere from 2-4 hours. This will depend on the temp of your home. Just keep an eye on it. You’re looking for a dough that has noticeably risen.
Step Five – Bake The Bread
We’re going to bake this bread in a 400 degree oven for 30-35 minutes. Or really until the exterior gets a nice golden brown crust around it.
Tips for Baking Sourdough Sandwich Bread

- Wait until the loaf cools completely before slicing! I learned this the hard way and ruined the shape of my bread. I know it’s tempting because it smells good, but just do it. It’s going to give the best end result.
- Rotate the bread halfway through the bake cycle within your oven to prevent one side from getting too done. Move it down to the bottom rack if you notice that it’s starting to get too brown for your liking on top.
- If your bread is not rising within the time frame given here, don’t be afraid to let it go a little longer. Yeasts are living things and sometimes they take a little longer to do their work.
- Make sure to knead the dough for the fill 10 minutes to develop that gluten structure. This helps the dough hold it’s shape.
White Sourdough Sandwich Bread
Ingredients
- 1/2 Cup of Fed Sourdough Starter
- 3 1/4 Cup of Unbleached All Purpose Flour
- 1 Cup of Warm Whole Milk
- 3 Tbsp of Melted Butter
- 1 Tbsp of Honey or Organic Cane Sugar
- 1 Tsp Salt
Instructions
- In a bowl, mix together the milk, starter, honey or sugar, and melted butter
- In a larger seperate bowl, mix together the flour and salt
- Add the wet ingredients into the dry ingredients until combined
- Knead the dough for ten minutes
- Place the dough in an oiled bowl and let bulk ferment for 6-8 hours
- Punch the rised dough down and roll into a rectangle
- Roll the dough up like a cinnamon roll log and place into a greased bread pan for proofing
- Let proof for 2-4 hours until fully risen
- Bake in a 400 degree oven for 30-35 minutes

